A cardiovascular examination OSCE is not just a test of whether you know where to place your stethoscope. It is a bedside performance. The examiner is watching whether you look safe, obtain consent, expose appropriately, inspect before touching, assess the pulse properly, handle the JVP honestly, identify clinically important murmurs, check for heart failure, and close with a structured clinical summary.
Many students memorize a cardiovascular examination checklist but still lose marks because the performance feels rushed, silent, incomplete, or disconnected from clinical meaning. This guide fixes that by giving you a repeatable 7-step routine: what to do, what to say, what the examiner is likely marking, and how to finish like a high-scoring candidate.
Use this guide as a practical OSCE framework. Local medical schools may vary in their exact mark scheme, so adapt the details to your institution, but keep the same principles: patient safety, dignity, systematic examination, accurate technique, and clear interpretation.
If you are still learning how OSCE examiners convert visible actions into marks, start with our Ultimate Guide to OSCE Mark Schemes (2026)). It explains how checklist items, communication marks, and global ratings work, so you can understand why this cardiovascular sequence is designed around visible, scoreable actions.
Put it into practice
Can you perform the cardiovascular exam under OSCE pressure?
Reading the sequence is useful. Performing it under time pressure is different. Practice realistic OSCE scenarios on OSCE.ai and get structured feedback on your clinical decisions.
Practice OSCE stations free →How examiners usually score cardiovascular examination
Most cardiovascular examination stations are marked with a combination of itemized checklist marks and a global rating. Checklist marks reward observable actions: hand hygiene, consent, pulse assessment, JVP technique, apex beat, auscultation, edema check, and summary. The global rating rewards the overall quality of performance: confidence, flow, patient comfort, prioritization, clinical interpretation, and whether the examination feels safe and credible.
That means a high score is not achieved by doing every possible peripheral sign. A high score comes from doing the essential sequence well, making important actions visible to the examiner, and interpreting your findings at the end.Must-do in most cardiovascular examinations Optional / clinically indicated Introduce yourself, confirm identity, explain, consent, ask about pain, expose with dignity, position at 45 degrees Offer a chaperone according to local policy, especially when chest exposure may be sensitive General inspection from the end of the bed Detailed environmental clues if relevant: GTN spray, oxygen, monitors, walking aids, fluid balance charts Radial pulse rate, rhythm, volume/character; assess for irregularity Collapsing pulse, radio-radial delay, radio-femoral delay if clinically relevant or requested Measure blood pressure, or clearly state that you would measure it if equipment/time limits the station Measure both arms at first assessment or if aortic dissection, coarctation, peripheral vascular disease, or inter-arm difference is suspected Face, JVP at 45 degrees, and gentle carotid examination only when clinically appropriate Carotid bruits if indicated; avoid forceful carotid palpation in frail patients or those with known carotid disease/TIA/stroke symptoms; hepatojugular reflux if assessing suspected right heart failure Apex beat, heaves, thrills, systematic auscultation with diaphragm and bell Targeted dynamic maneuvers such as Valsalva, standing, squatting, or handgrip only when a murmur suggests a specific lesion or the examiner asks Posterior lung bases and peripheral edema Sacral edema if bedbound; leg vein-harvest scars if previous CABG suspected Thank patient, re-cover, hand hygiene, structured summary, completion steps Clinical hierarchy: observations/BP, 12-lead ECG, echocardiography for murmurs or suspected structural disease, then tailored blood tests/CXR
The 7-step cardiovascular examination system
The point of this system is not to make you robotic. It is to protect your performance under pressure. If your route is automatic, your brain is free to interpret findings rather than trying to remember what comes next.
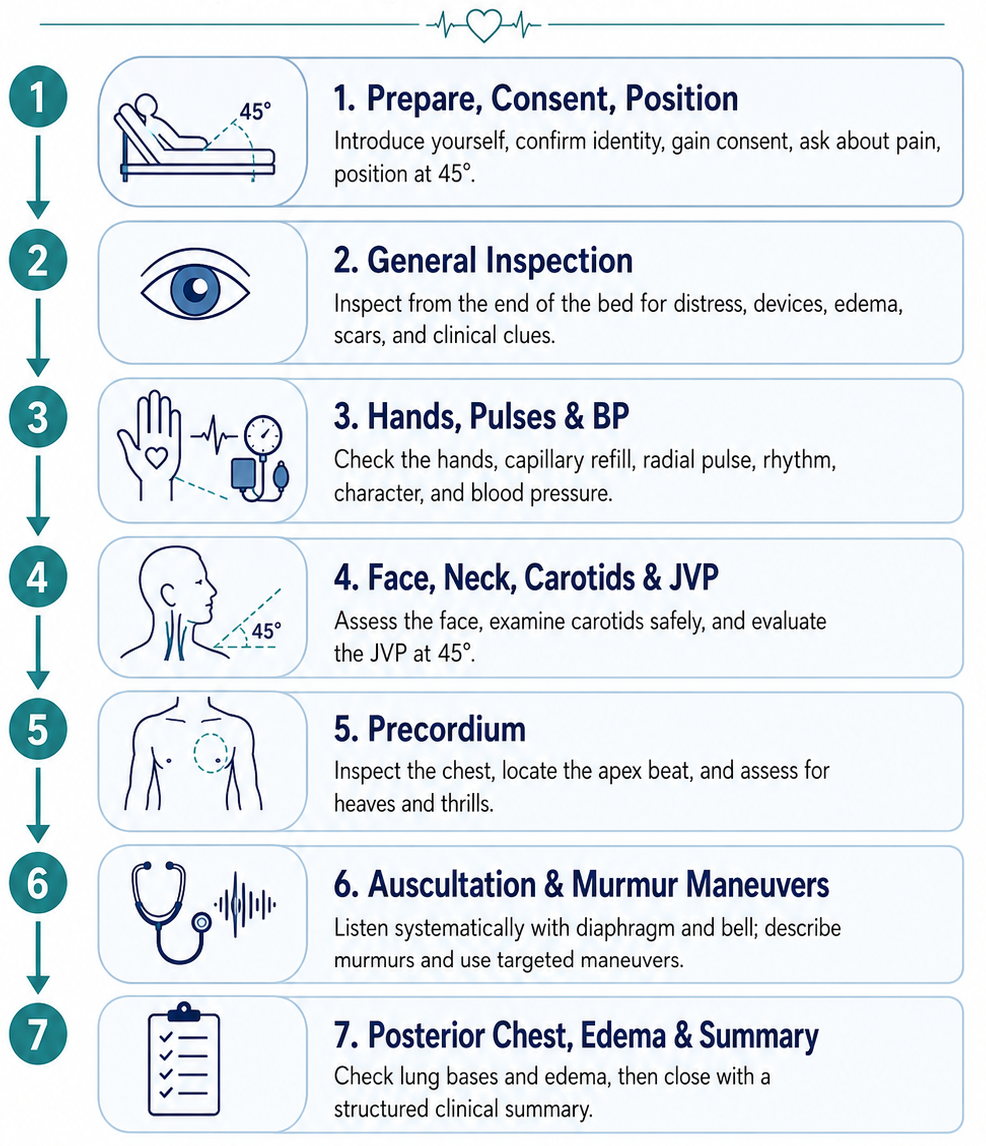
Step 1: prepare, consent, position, and expose
The first thirty seconds create the examiner’s first impression. You should look organized before you touch the patient.
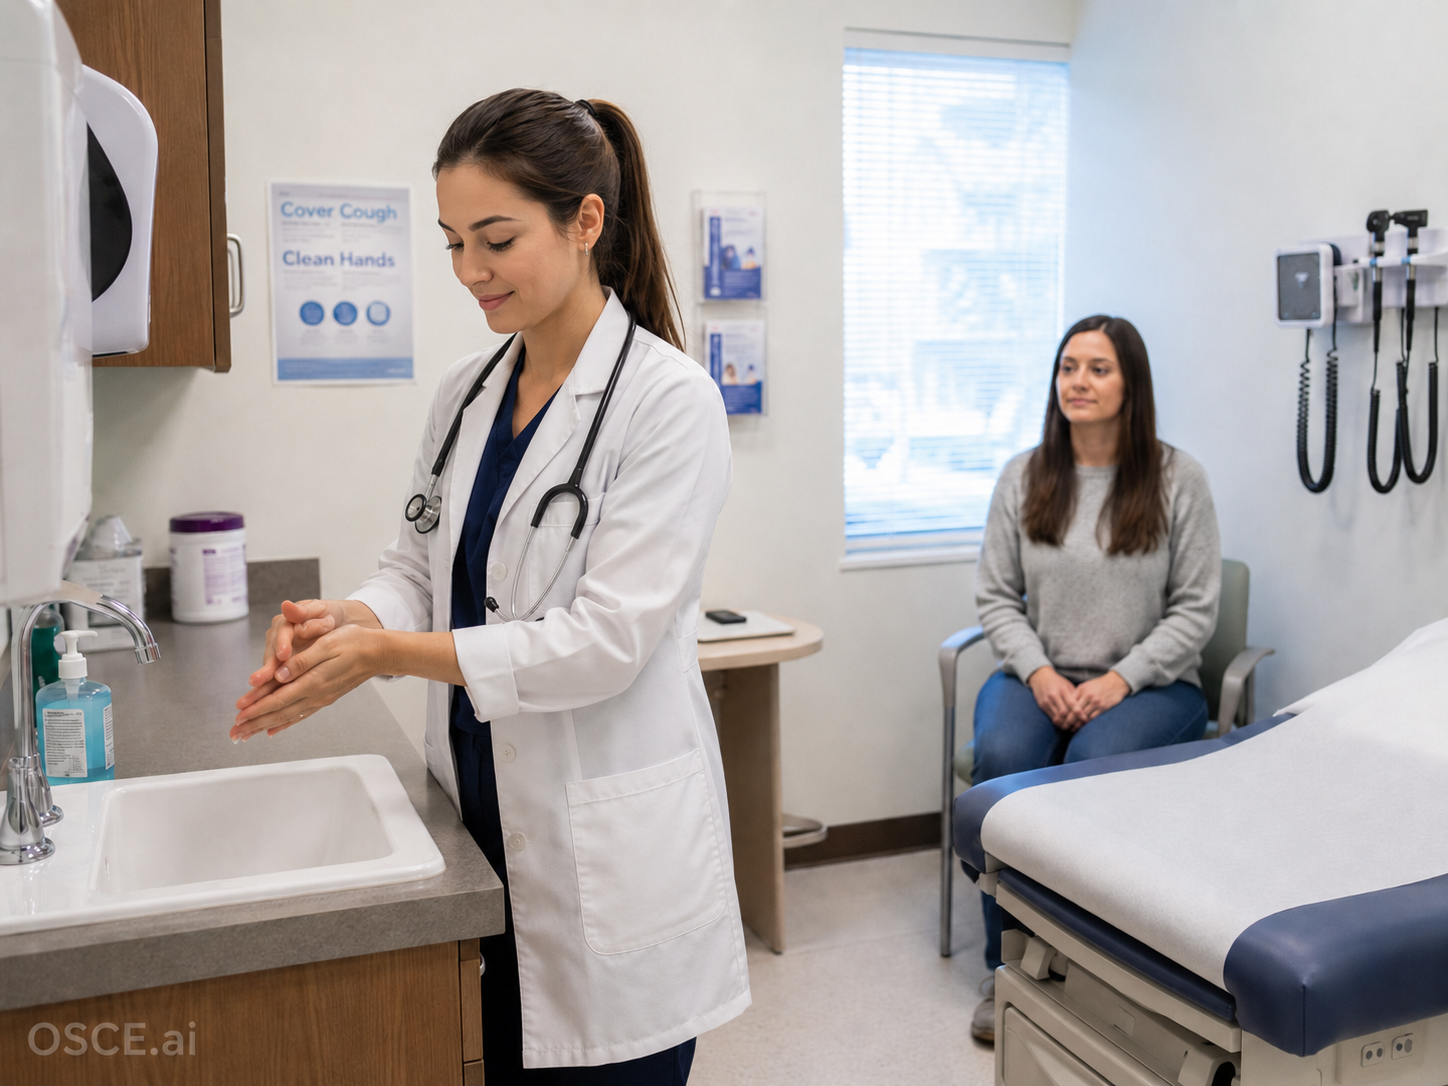
- Clean your hands.
- Introduce yourself and confirm the patient’s name and date of birth.
- Explain that you have been asked to examine the heart and circulation.
- Mention that the examination involves looking at the hands, face, neck and chest, feeling pulses, and listening with a stethoscope.
- Gain consent and ask about pain.
- Position the patient at approximately 45 degrees unless they are uncomfortable or too breathless.
- Expose the chest sufficiently while preserving dignity with a sheet or gown. Follow local policy about chaperones.
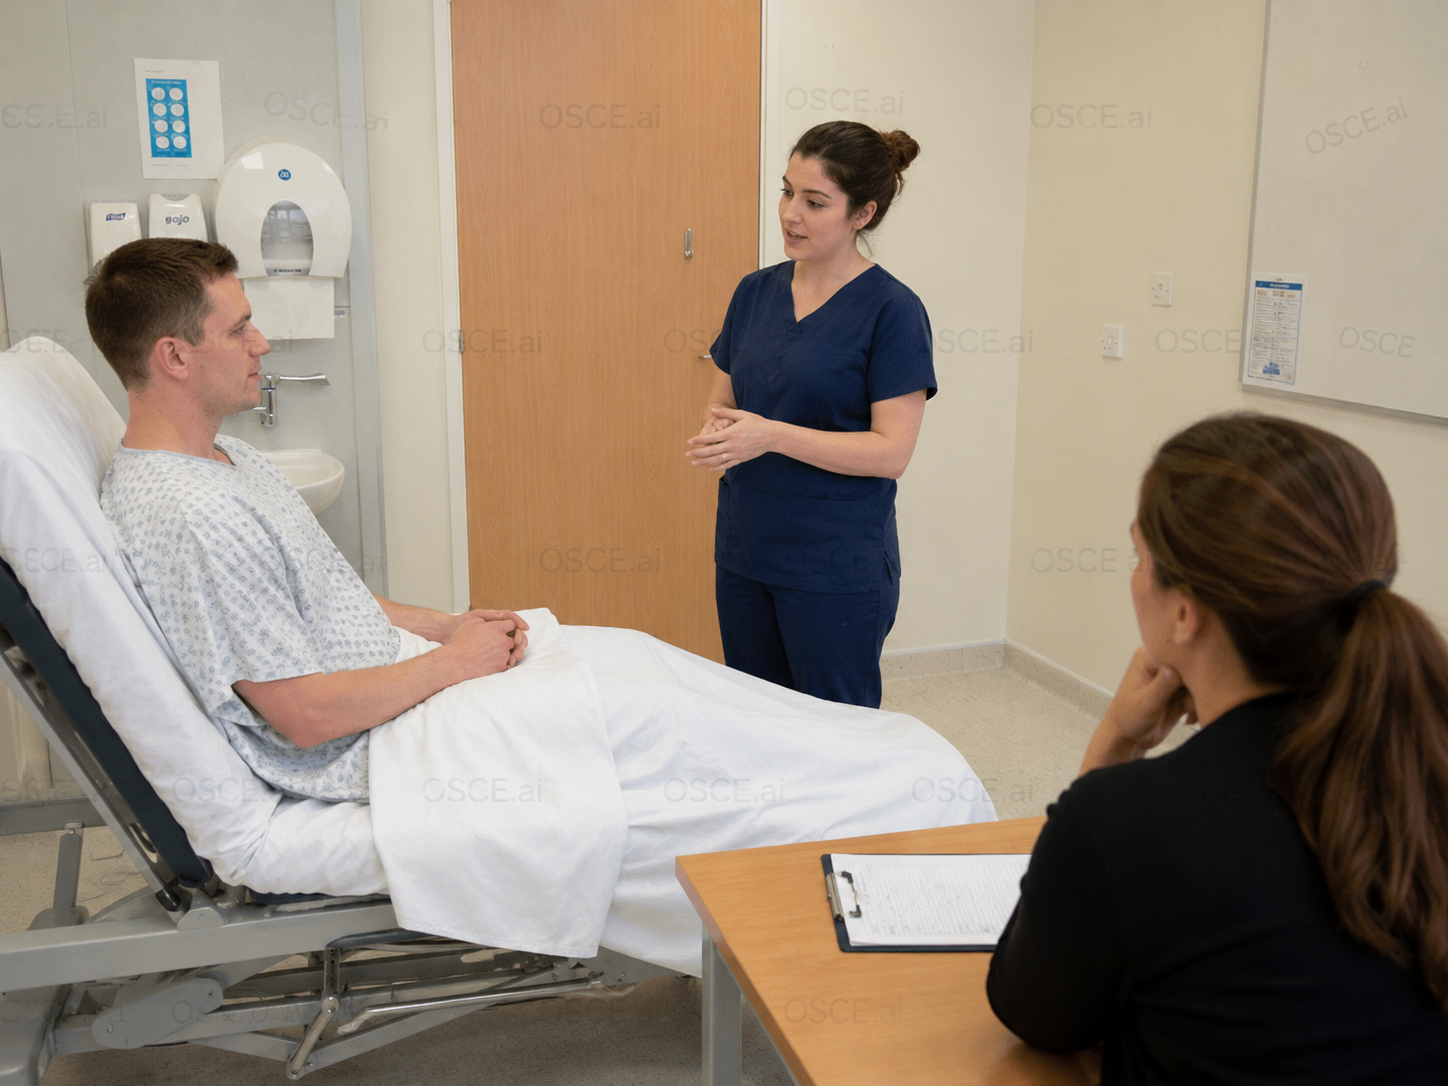
High-scoring opening script: “Hello, my name is [Name]. I’m one of the medical students. Could I confirm your name and date of birth, please? I’ve been asked to examine your cardiovascular system today. This will involve looking at your hands, face, neck and chest, feeling your pulse, and listening to your heart and lungs with my stethoscope. I’ll keep you covered as much as possible. Is that okay? Are you in any pain before we start?”
What the examiner is ticking: hand hygiene, identity check, explanation, consent, pain check, correct position, adequate exposure, patient dignity, and safe communication.
Common lost mark: starting the examination before explaining the chest exposure or asking about pain.
Step 2: general inspection from the end of the bed
Do not touch the patient before you have inspected them. This is where you demonstrate clinical awareness rather than checklist behavior.
- Look at the patient: comfort, breathlessness, distress, pallor, cyanosis, sweating, cachexia, peripheral edema, and whether they look acutely unwell.
- Look around the bed: oxygen, nebulizers, cardiac monitors, ECG leads, GTN spray, medication boxes, fluid charts, urine bottles, walking aids, and multiple pillows suggesting orthopnea.
- Look for visible scars, devices, or chest wall deformity if the chest is already exposed.
Normal inspection line: “From the end of the bed, the patient appears comfortable at rest, with no obvious respiratory distress, cyanosis, pallor, or peripheral edema. There are no obvious oxygen devices, monitors, or medication clues around the bed.”
Positive finding line: “The patient appears mildly breathless at rest and is sitting upright with multiple pillows, which may suggest orthopnea.”
Common lost mark: staring silently, then moving straight to the radial pulse without reporting what you inspected.
Step 3: hands, pulses, and blood pressure
The hands and pulses give clues about perfusion, rhythm, infective endocarditis, valve disease, vascular disease, and previous procedures. In a 7-minute station, prioritize the core signs first; add rarer peripheral stigmata only when time or the clinical scenario points to them.
This step is where you move from general inspection to peripheral cardiovascular signs. In an OSCE, the aim is not to name every rare sign, but to show a safe, structured, examiner-friendly sequence.What to do What to look for or assess OSCE tip Inspect the hands Peripheral cyanosis, pallor, clubbing, scars from procedures, hand temperature, and capillary refill time Say what you are checking aloud so the examiner can credit you. Look for targeted signs Splinter haemorrhages, Janeway lesions, Osler nodes, nicotine staining, xanthomata, and other signs of endocarditis or vascular risk Do these if clinically relevant or if time allows. Do not let them interrupt your main examination flow. Palpate the radial pulse Rate, rhythm, volume, and character If the pulse is irregular, state: “I would count the pulse for a full minute.” Check radio-radial delay Compare both radial pulses at the same time Most relevant when considering conditions such as aortic coarctation or large-vessel disease. Assess for a collapsing pulse, if appropriate A rapidly rising and falling pulse, classically associated with aortic regurgitation Only do this safely: warn the patient, check for shoulder pain, and support the arm. In a full exam, the brachial pulse is often better for this. Measure blood pressure Blood pressure as a core cardiovascular vital sign In an OSCE, offer to measure it if no cuff is available. In real clinical practice, blood pressure should not be omitted.
Pulse script: “I’m just checking your pulse for rate, rhythm, volume and character. If it feels irregular, I would count it for a full minute.”
Blood pressure line: “I would measure the blood pressure with an appropriately sized cuff. I would check both arms at first assessment, or if there is concern about aortic dissection, coarctation, peripheral vascular disease, or a significant inter-arm difference.”
Common lost mark: touching the pulse for two seconds and saying “normal” without demonstrating rate, rhythm, and character.
Step 4: face, neck, carotids, and JVP
This is where many students lose confidence. Keep it simple: inspect the face, examine carotids safely, then assess the JVP using a repeatable method.
- Face: conjunctival pallor, corneal arcus, xanthelasma, central cyanosis, and dentition. Poor dentition may be relevant in infective endocarditis, but it is only a supportive clue, not a diagnosis.
- Neck/carotids: auscultate for carotid bruits if indicated or if it is part of your taught routine. Palpate one carotid at a time, gently, and only when clinically appropriate. Never palpate both carotids together. Be especially cautious in frail patients or patients with known carotid disease, previous TIA/stroke, prominent bruits, or symptoms suggesting cerebrovascular disease.
- JVP: recline the patient at about 45 degrees, turn the head slightly away, relax the neck, use tangential light if available, and look for internal jugular venous pulsation.
- Differentiate venous pulsation from carotid pulsation: JVP is usually non-palpable, has a waveform, varies with respiration, and changes with bed angle.
- Measure the vertical height above the sternal angle if visible. In OSCE terms, a JVP less than about 3–4 cm above the sternal angle is usually described as not elevated. This is because the right atrium lies roughly 5 cm below the sternal angle, so this corresponds approximately to an upper normal venous pressure of about 8–9 cm H2O.
- If it is not visible, do not invent it. Say, “The JVP is not clearly visualized.”
JVP script: “I’m now assessing the jugular venous pressure with you reclined at about 45 degrees. I’m looking for the internal jugular venous pulsation and estimating its vertical height above the sternal angle.”
Examiner-grade reporting: “The JVP is visible and not elevated,” “The JVP appears raised at approximately [x] cm above the sternal angle,” or “The JVP is not clearly visualized.”
Common lost mark: looking vaguely at the neck and saying “JVP normal” without showing how you identified it.
Step 5: inspect and palpate the precordium
The precordial examination should follow a clear order: inspect, palpate the apex beat, feel for heaves, then feel for thrills. Do this before auscultation.
- Inspect for scars, visible pulsations, chest wall deformity, pacemaker or ICD, and previous surgery. A midline sternotomy scar may suggest previous CABG or valve surgery. A left infraclavicular device may suggest a pacemaker or ICD.
- Locate the apex beat. It is usually around the fifth intercostal space in the mid-clavicular line. A displaced apex may suggest cardiomegaly or volume overload.
- Assess the character of the apex if relevant: tapping, heaving, or thrusting. Do not force this if the station is basic or the apex is not palpable.
- Feel for a left parasternal heave, which may suggest right ventricular enlargement.
- Feel for thrills over the valve areas. A thrill is a palpable vibration caused by turbulent flow and usually corresponds to a grade 4/6 or louder murmur.
Palpation script: “I’m feeling for the apex beat now, then for any heaves or thrills.”
Common lost mark: going straight to auscultation and forgetting the apex beat, heaves, and thrills.
Step 6: auscultate systematically and describe murmurs properly
Auscultation is not just placing the stethoscope on four areas. The examiner wants to see that you listen systematically, use both diaphragm and bell intentionally, time the cardiac cycle, and interpret abnormal sounds.
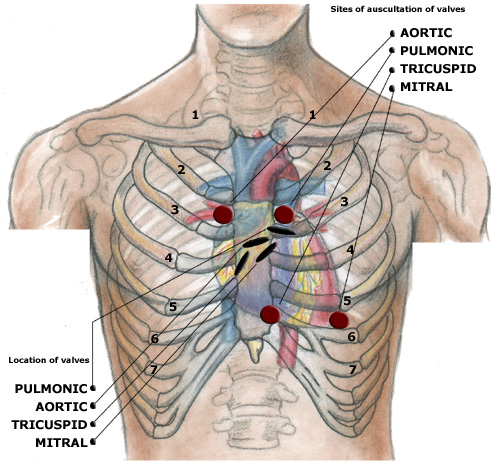
- Use the diaphragm first to listen at the aortic area, pulmonary area, tricuspid area, and mitral area.
- Listen for S1 and S2, added sounds such as S3 or S4, murmurs, and rubs.
- Use the bell lightly at the apex for low-pitched sounds, especially mitral stenosis.
- Time murmurs with the carotid pulse if safe and appropriate, because the carotid pulse is closer to the heart than the radial pulse. In many OSCEs, palpating the pulse while listening is a useful way to show you are timing systole.
- If you hear a murmur, describe it before naming it: timing, site, radiation, character, pitch, intensity/grade, response to respiration, and response to maneuvers. Do not perform every maneuver routinely; select maneuvers only when they answer a specific diagnostic question or the examiner asks for further characterization.
- Check radiation deliberately: axilla for mitral regurgitation, carotids for aortic stenosis, and left sternal edge for aortic regurgitation.
Auscultation script: “I’m going to listen across the heart valves. I may also feel your pulse at the same time to time the heart sounds.”
Maneuver rule: describe the murmur first, then choose the maneuver that tests your suspected lesion. This keeps the examination clinically purposeful and protects time in a short station.Finding you suspect What to do in the OSCE Why it helps Aortic stenosis Listen at the aortic area, then over the carotids for radiation. Describe an ejection systolic murmur if present. Aortic stenosis commonly radiates to the carotids. Mitral regurgitation Listen at the apex and then in the axilla. Mitral regurgitation classically radiates to the axilla. Mitral stenosis Ask the patient to roll into the left lateral position. Use the bell lightly at the apex, often after expiration. The low-pitched mid-diastolic rumble is best heard with the bell at the apex. Aortic regurgitation Ask the patient to sit forward, breathe out fully, and hold briefly. Use the diaphragm along the left sternal edge. The early diastolic murmur is often easier to hear in this position. Right-sided murmurs Listen during inspiration and compare with expiration. Many right-sided murmurs become louder with inspiration. HOCM or mitral valve prolapse If advanced maneuvers are expected, consider standing/Valsalva and squatting only when HOCM or MVP is suspected. Use only if taught, safe, and time permits. These maneuvers alter preload and can help differentiate dynamic murmurs; routine use in every station wastes time. MR, AR, or VSD Handgrip can be used in advanced stations when MR, AR, or VSD is suspected and further characterization is needed. Handgrip increases afterload and may accentuate regurgitant murmurs; it should be targeted, not routine.
Common lost mark: hearing a murmur but failing to describe timing, site, radiation, and the relevant maneuver—or wasting time on untargeted maneuvers.
Step 7: posterior chest, edema, closure, and summary
A cardiovascular examination does not end after the heart sounds. You must check for consequences of cardiac disease, especially pulmonary congestion and peripheral fluid overload.
- Ask the patient to sit forward if they can. Listen to the posterior lung bases for crackles, which may suggest pulmonary edema in the right clinical context.
- Check for sacral edema if the patient is bedbound.
- Check ankles or lower legs for pitting edema. Press gently for several seconds and look for a persistent indentation.
- Inspect the legs for vein-harvest scars if previous CABG is relevant.
- Thank the patient, help them get covered, ensure they are comfortable, and clean your hands.
Posterior chest script: “I’m going to listen at the bases of your lungs now, as fluid can sometimes collect there in heart conditions.”
Closure script: “That completes the examination. Thank you. I’ll help you get covered again. Are you comfortable?”
Common lost mark: stopping immediately after auscultating the precordium and forgetting lung bases, edema, dignity, hand hygiene, and summary.
Examiner-facing summary templates
A strong summary is structured. It should include: general appearance, key positives, key negatives, pulse, blood pressure or a clear statement that it should be measured, JVP, apex/precordium, auscultation, heart failure signs, overall impression, and completion steps. State investigations in a clinical hierarchy rather than as a random list.
Normal summary template
“Today I examined this patient’s cardiovascular system. The patient was comfortable at rest, with no obvious respiratory distress. There were no peripheral stigmata of cardiovascular disease. The pulse was regular with good volume, the JVP was not elevated, and the apex beat was not displaced. There were no heaves or thrills. Heart sounds were normal, with no murmurs or added sounds. The lung bases were clear and there was no peripheral edema. Overall, this was a normal cardiovascular examination. To complete my assessment, I would ensure observations including blood pressure are recorded, review a 12-lead ECG, and request further investigations only if clinically indicated.”
Abnormal murmur summary template
“Today I examined this patient’s cardiovascular system. The key positive findings were [finding 1], [finding 2], and [finding 3]. The pulse was [regular/irregular], blood pressure was [state value/not yet measured], the JVP was [not elevated/raised/not clearly visualized], and the apex beat was [normal/displaced]. On auscultation, there was a [systolic/diastolic/continuous] murmur heard loudest at the [site], radiating to the [axilla/carotids/none], with [character] quality and grade [x/6 if systolic]. It was accentuated by [maneuver/respiration if tested]. There were [basal crackles/peripheral edema/no signs of fluid overload]. Overall, these findings are most consistent with [likely diagnosis]. To complete the assessment, I would record full observations including blood pressure, obtain a 12-lead ECG, arrange echocardiography as the key test for suspected structural or valvular disease, and request blood tests or chest X-ray according to the clinical context.”
Abnormal rhythm summary template
“The pulse was irregularly irregular, which raises concern for atrial fibrillation. I would confirm this with a 12-lead ECG, check blood pressure and hemodynamic stability, review symptoms and risk factors, and consider appropriate management according to local guidance.”
Communication scripts for a cardiovascular examination
| Moment | Script |
| Opening | “Hello, I’m [Name], one of the medical students. I’ve been asked to examine your cardiovascular system today. Is that okay?” |
| Pain check | “Are you in any pain before I begin?” |
| Exposure | “I need to expose the chest to examine properly, but I’ll keep you covered as much as possible.” |
| Pulse | “I’m going to feel your pulse now.” |
| JVP | “I’m going to look at the veins in your neck, so I’ll turn your head slightly and keep you at this angle.” |
| Precordial palpation | “I’m going to feel the front of your chest now for the heartbeat and any abnormal vibrations.” |
| Auscultation | “I’m going to listen to your heart in a few different areas. You may feel the stethoscope move around the chest.” |
| Left lateral position | “Could you roll slightly onto your left side for me? I’m going to listen again at the apex.” |
| Sitting forward | “Could you sit forward, take a deep breath in, breathe all the way out, and hold it briefly while I listen?” |
| Closing | “That completes the examination. Thank you. I’ll help you get covered again.” |
High-score tips
1. Prioritize the core sequence. In a short station, do not let rare peripheral signs consume the time needed for blood pressure, JVP, apex beat, auscultation, lung bases, edema, and summary.
2. Make your method visible. You do not need to narrate every movement, but short phrases help the examiner see your structure.
3. Treat the pulse as a real clinical sign. Rate, rhythm, volume, and character matter. Irregularly irregular rhythm is a high-value finding.
4. Do not fake the JVP. If it is not visualized, say so. This is safer than claiming “not raised” without seeing it.
5. Describe murmurs before naming them. A student who describes a murmur accurately can still score well even if the final diagnosis is uncertain.
6. Use the bell and diaphragm deliberately. The bell is especially useful for low-pitched sounds such as mitral stenosis at the apex.
7. Always finish beyond the heart. Lung bases and edema show that you are assessing cardiovascular consequences, not only heart sounds.
8. Close like a clinician. Give key positives, key negatives, overall impression, and how you would complete the assessment.
Common mistakes in cardiovascular examination
- Forgetting consent, pain check, or dignity before chest exposure.
- Spending too long on rare peripheral signs and rushing the precordium.
- Assessing the pulse too briefly and missing rhythm abnormalities.
- Treating blood pressure as optional in real clinical assessment, or failing to offer it clearly in an OSCE.
- Palpating both carotids at the same time, or palpating aggressively/without clinical indication.
- Confusing the carotid pulse with the JVP.
- Saying “JVP normal” when the JVP was not actually seen.
- Forgetting the apex beat, parasternal heave, or thrills.
- Using only the diaphragm and forgetting the bell.
- Hearing a murmur but failing to describe it systematically, check radiation, or select targeted maneuvers.
- Forgetting left lateral positioning for mitral stenosis.
- Forgetting sitting forward in expiration for aortic regurgitation.
- Skipping posterior lung bases and peripheral edema.
- Ending without re-covering the patient, washing hands, or giving a structured summary.
Compact cardiovascular examination OSCE checklist
| Phase | Checklist |
| Preparation | Hand hygiene; introduce self; confirm identity; explain; consent; pain check; 45-degree position; expose with dignity. |
| General inspection | Comfort; distress; breathlessness; pallor/cyanosis; edema; scars/devices; oxygen/monitors/medication clues; orthopnea clues. |
| Hands and pulses | Core: temperature; capillary refill; clubbing; procedure scars; radial pulse rate/rhythm/volume/character; BP or clear offer to measure it. Targeted if relevant: splinter hemorrhages, Janeway lesions/Osler nodes, xanthomata; radio-radial delay; collapsing pulse. |
| Face, neck, JVP | Conjunctival pallor; corneal arcus; xanthelasma; central cyanosis; dentition as a risk clue only; carotids one side at a time, gently and only when appropriate; bruits if indicated; JVP at 45 degrees; report honestly. |
| Precordium | Inspect scars/deformity/devices; apex beat; parasternal heave; thrills; aortic/pulmonary/tricuspid/mitral auscultation; diaphragm and bell; time murmur; radiation; targeted maneuvers only when clinically indicated. |
| Completion | Posterior lung bases; sacral edema if bedbound; ankle/leg edema; vein-harvest scars; re-cover patient; thank patient; hand hygiene; structured summary; completion in hierarchy: observations/BP, 12-lead ECG, echo for murmur/structural disease, then tailored bloods/CXR. |
FAQ
What is the correct order for a cardiovascular examination?
A reliable order is: prepare and position, general inspection, hands and pulses, face and neck, JVP, precordial inspection and palpation, auscultation, posterior chest, edema, and closure.
What should I say at the start?
State who you are, confirm identity, explain that you will examine the heart and circulation, mention chest exposure and stethoscope use, gain consent, and ask about pain.
What if I cannot see the JVP?
Do not invent a finding. Say, “The JVP is not clearly visualized.” This is more clinically mature than saying “JVP normal” when you did not identify it.
How do I tell whether a murmur is systolic or diastolic?
Time the murmur against S1 and S2. Palpating the carotid pulse gently can help identify systole if it is safe and your local teaching allows it; if local teaching discourages carotid palpation for timing, rely on heart sounds and your taught method.
When should I use the bell?
Use the bell lightly, especially at the apex, for low-pitched sounds such as mitral stenosis. Use the diaphragm for most other heart sounds and murmurs.
What should I do if I hear a murmur but cannot name it?
Describe it first. State timing, site, radiation, character, intensity, and response to maneuvers. Accurate description can score highly even if you are uncertain of the exact diagnosis.
How should I finish the station?
Thank the patient, help them cover up, wash your hands, summarize key findings, give your overall impression, and state how you would complete the assessment in a clinical order: observations including blood pressure, 12-lead ECG, echocardiography for suspected murmurs/structural disease, and then tailored blood tests or chest X-ray depending on the presentation.
Conclusion
A high-scoring cardiovascular examination is not simply a memorized checklist. It is a structured clinical performance. You need to examine safely, communicate clearly, make your technique visible, interpret signs correctly, and close with a confident summary.
Use the 7-step system every time: prepare, inspect, examine the hands and pulses, assess the face and JVP, examine and auscultate the precordium, check the back and edema, then close with a clinical summary. The more you practice this as a complete performance, the less the station feels like a memory test and the more it feels like real clinical medicine.
If you are preparing for other physical examination stations, you may also find our Neurological Examination OSCE Guide useful. It applies the same examiner-focused approach to cranial nerves, upper limb, lower limb, cerebellar testing, gait, communication, and closure.
To practice cardiovascular OSCE stations with realistic patient scenarios, examiner-style prompts, and structured feedback, try OSCE.ai and rehearse the full station from opening script to final summary.
Selected references and further reading
- Felner JM. An Overview of the Cardiovascular System. In: Clinical Methods. NCBI Bookshelf.
- Stanford Medicine 25. Neck Vein Exam: Jugular Venous Pressure Measurement.
- MSD Manual Professional Edition. Cardiovascular Examination. Reviewed/Revised Apr 2025; Modified Apr 2026.
- MSD Manual Professional Edition. Cardiac Auscultation.
- Malik MB, et al. Cardiac Exam. StatPearls. NCBI Bookshelf.
- Bates’ Guide to Physical Examination and History Taking, 14th edition. Lippincott Connect / Wolters Kluwer.